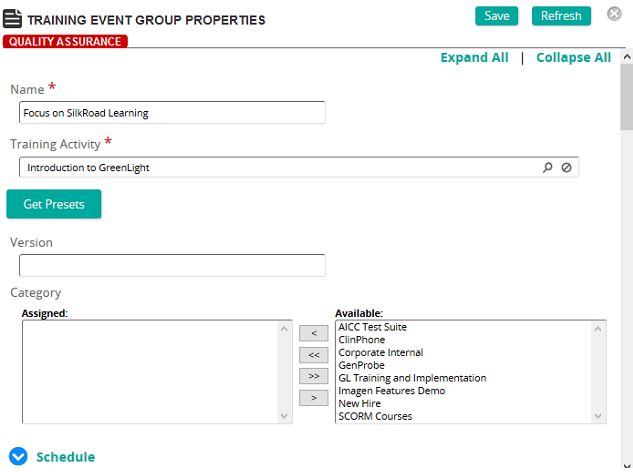
On the Training Event Group Properties page, you can create a training event group or modify an existing one.
Fields
Training Activity: Click  to search for and select a training activity.
Note: Linking to a training activity automatically loads the presets for the activity into the event group. To restore any preset values from the linked activity, click Get Presets.
Version: The version is inherited from the training activity. This version is attached to all student records created for the event.
Categories: To assign categories, click a category or categories from the Available list and use the arrow buttons to move them to the Assigned list.
 Schedule
Status: Select one of the following statuses:
- Planning - The initial state of a Training Event once it has been created. Training Events in planning can be loaded to the Planning Board, but does not appear on the Calendar. Training Event notifications are not triggered by Training Events in Planning status.
- Scheduled – Scheduled Training Events can be loaded to the Planning Board, appear in the Training Calendar/Course Catalog, and trigger Training Event notifications when an active notification exists. Students can self-enroll at this level. Scheduled Training Events may still be Canceled for insufficient enrollments or other reasons.
- Confirmed – Training Events that are changed to Confirmed are Training Events that will be offered and usually not cancelled. Confirmed Training Events can be loaded to the Planning Board, appear in the Training Calendar/Course Catalog, and trigger Training Event notifications when an active notification exists.
- Cancelled – Training Events that are changed to Cancelled are removed from the Training Calendar/Course Catalog. Cancelled Training Events trigger Training Event Cancel notifications when an active notification exists.
Note: Users currently enrolled in a cancelled event can enroll in another class in the same course. - Closed – Training Events that are changed to Closed prevent students from self-enrollment. The Closed status can be used to shut off additional enrollments.
- Completed – Training Events that are changed to Completed. The Completed status can be used to identify training events where a student record has been recorded.
Start Date: Click Select Date and select a date, then using the slide select the hour and minute. If the site is configured to set time zones, select a time zone from the drop-down box. Any Training Event Notifications using Outlook invites that are triggered for the event will notify the recipient in their local time zone. Click Done.
Span Type: Select either End Date, Instructional Time, or Multiple Sessions.
End Date: If you selected End Date for Span Type, use the calendar and time pop-ups to select date and time.
Instructional Time: If you selected Instructional Time for Span Type, type the hours and minutes.
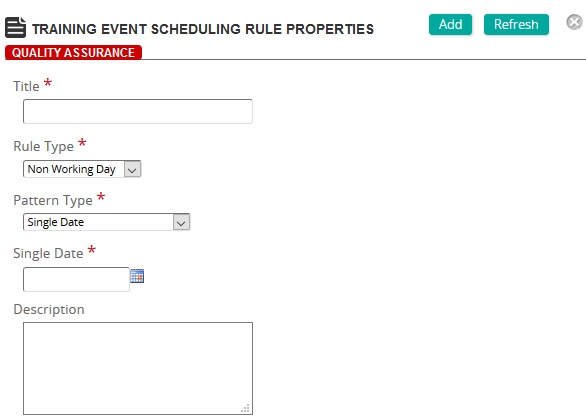
Scheduling Rules: Create a scheduling rule to override an existing global scheduling rule or if there are special circumstances that require the event to be scheduled differently. Click Add to create and add a scheduling rule to this training event.
Vendor: Click to search for and select a vendor from the Vendors page.
Associated Survey: If applicable, associate a survey to the training event. Associating a survey is used for reporting purposes only. Survey data must be entered manually using the survey assess function.
Administrator Name: Type the name of the course administrator.
Administrator Email: Type the email of the course administrator.
Training Events Contact: Click Add to search for and select a contact or contacts for this training event. If the training event is part of a training event group, then the Training Event Contacts list is the list of all contacts for all events in the group. This contact list is the recipient list for TE Notifications if the notification is active. Contacts MUST be defined as a SilkRoad Learning Administrator user to be available as a training event contact.
Training Locations: Click Add to search for and select a training location or locations.
Enrollments
Minimum Enrollments: Type the minimum number of students to run or cancel a course.
Maximum Enrollments: Type the maximum number of students allowed to enroll in a course. Students enrolling after the maximum enrollment setting has been reached are automatically added to the waiting list for the event.
Note: Leaving this field empty means no maximum is set for the event. All students will be added to the enrollment list for the event. Entering 0 (ZERO) in this field means that all students will be added to the waiting list for the event.
Enrollment Cut-off: Type the number of days before a course to stop automatic enrollments. Students enrolling on or after this date are automatically added to the waiting list for the event.
Student May Cancel Training Event Enrollment: Select this check box to allow the student to cancel enrollment in the course.
Cancellation Cut-off: Type the number of days students can no longer cancel enrollment to help administrators determine whether a cancellation penalty will be imposed.
Cancellation Penalty: Type the percentage of the cancellation penalty if any.
Absentee Penalty: Type the percentage of the absentee penalty if any.
Enrollment Approval Required: Select this check box if approval is required before enrollment.
Notes: Type any pertinent information about the event.
Syllabus Notes: Type information for the syllabus. This appears in the Course Catalog Item.
 and then click Properties.