|
|
|
Configuring an Ad Hoc form
Rival WingSpan administrators configure an Ad Hoc form by creating a custom node (Assessor Initiated Assessment node type) on the Manage Navigation page.
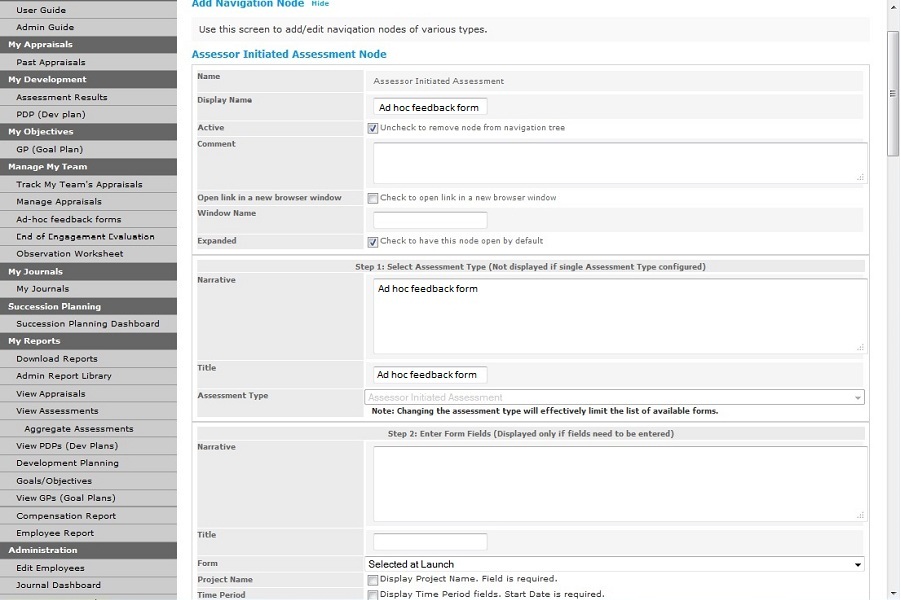
The Rival WingSpan administrator completes all required fields on this page as appropriate. Step 2: Enter Form Fields section has two important options to consider:
- Display Project Name. Field is required. - When selected, Project Name is enabled on the ad hoc form and is required.
- Display Time Period fields. Start Date is required. - When selected, Time Period fields (Start date and End date) are enabled on the ad hoc form and Start date is required.
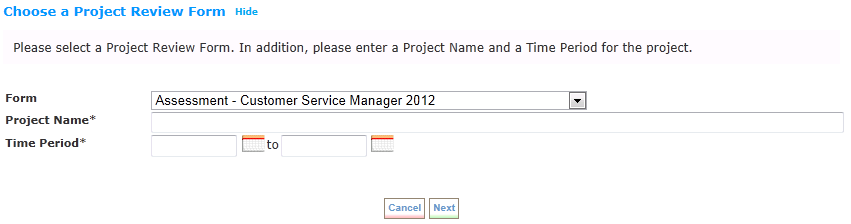
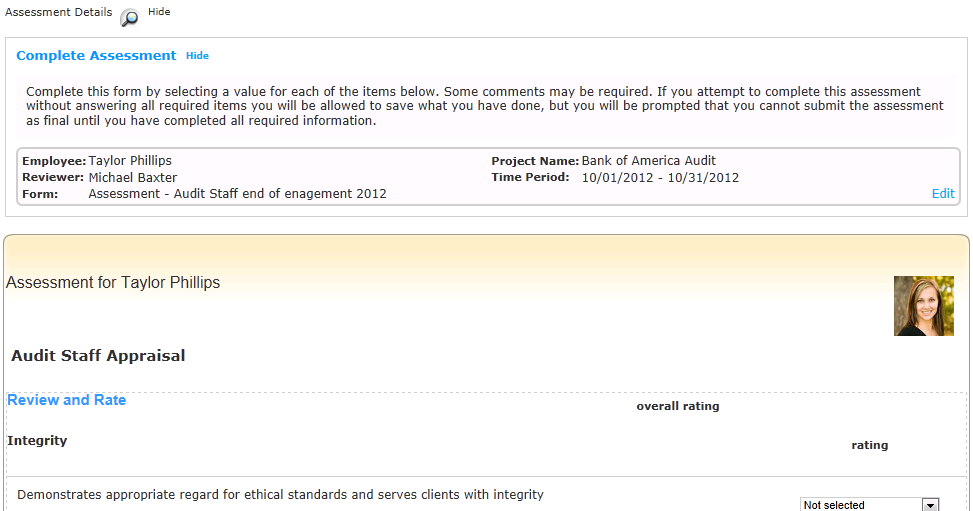
When the Project Name and Time Period fields are enabled for Ad Hoc forms, they appear on the Ad Hoc Form wizard in these sections:
- Choose a Project Review Form section
- Details section
Choose a Project Review Form section
On the first step of the wizard where a user selects a form, a Project Name and a Time Period must be entered.
Details section
On the last step of the wizard in the Details section where a user writes the form, the Project Name and Time Period can be viewed at the top of the form.
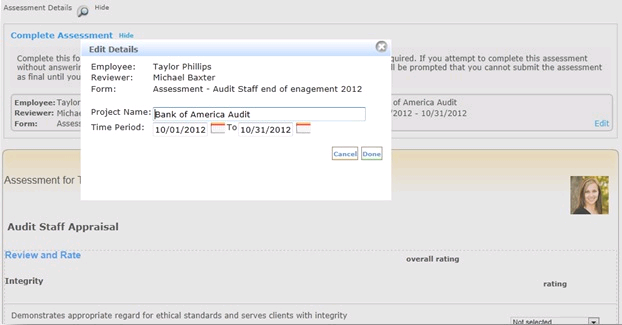
You can also edit the Project Name and Time Period by clicking Edit in the Details section:
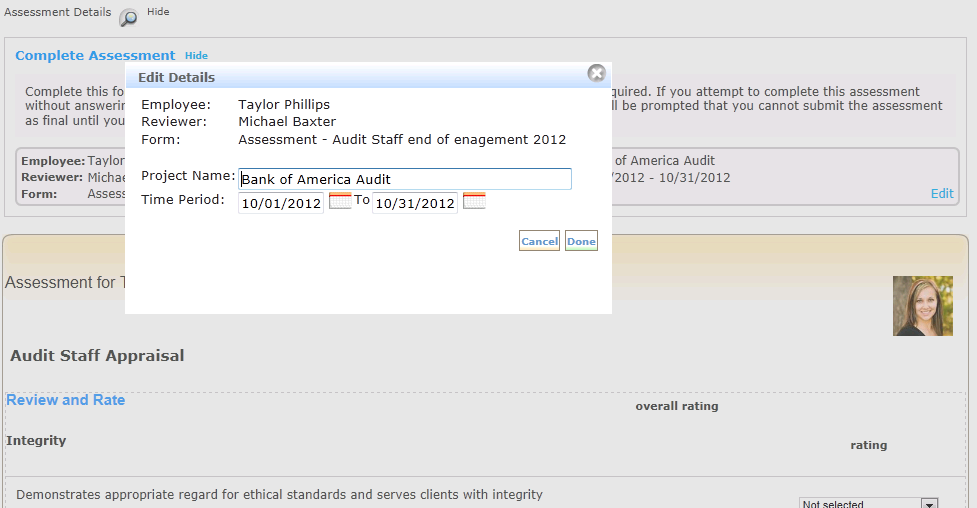
In addition, a user can edit the Project Name and Time Period by clicking Edit in the Details section:
In this section |
|
© 2023 Rival. All rights reserved. |

 |