|
|
|
Manage navigation
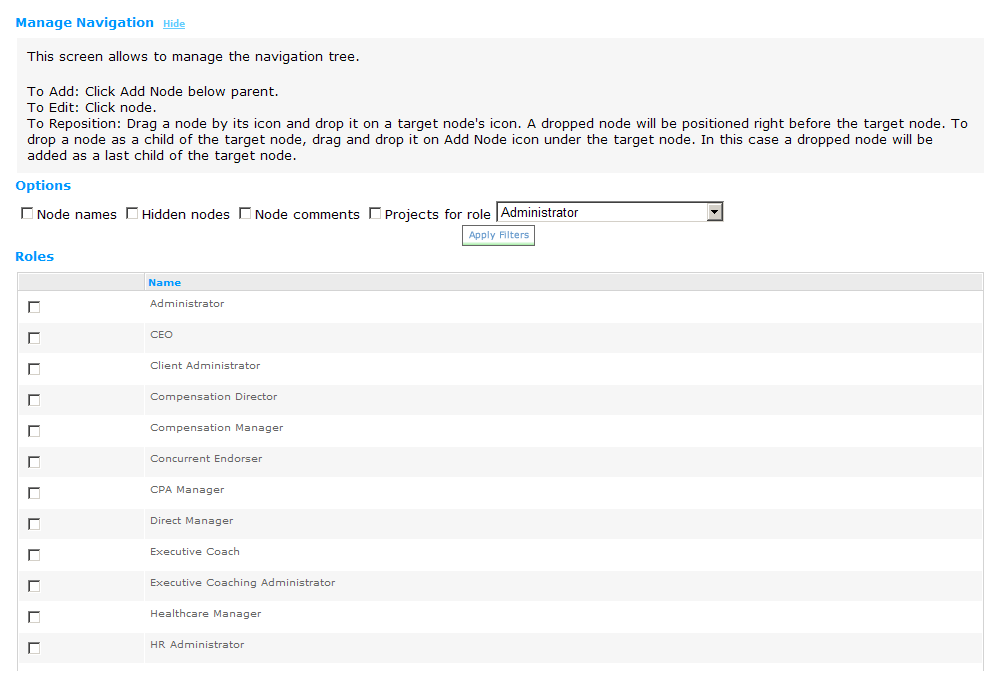
The Manage Navigation screen allows you to manage access to the Nodes on the navigation bar by system role. Each user will have access to different Nodes on the Navigation bar depending on the set of system roles they have. You will be able to maintain user access through the Manage Navigation screen. Access for the various roles is set-up during implementation.
Note Consult with your Rival WingSpan Implementation Consultant if you need to make changes to Site Navigation. It is important to remember that Navigation changes are Role specific and any changes made affect EVERYONE with that role. Due to the varying scenarios that can be used to manipulate the Navigation function, training or the assistance of your Rival WingSpan Implementation Consultant is necessary.
Navigation Tree
The Navigation Tree is the outline that is used to create the Navigation bar for a user. The Navigation Tree resembles an outline where there are headings and sub-headings. Rival WingSpan uses headings (parent) and sub-headings (child) in reference to organizing the Navigation Tree.
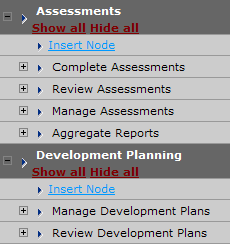
Node
A node is a link or function on the Navigation bar.
Options Filters
Once you are in the Manage Navigation section, you can Apply Filters to the Navigation Tree depending on what you want to accomplish. The following filter options are available:
Node Names—displays the internal name of the link beneath the display name. This cannot be changed by the admin. Use this option to see the original name of the link when the display name has been customized.
Hidden Nodes—displays nodes that are not visible to a user. These are nodes that are not visible in the Manage Navigation screen because they are disabled. Selecting Hidden Nodes allows you to see all nodes regardless of their status. Use this option to find disabled nodes that you may want to enable.
Node Comments—displays comments associated with the nodes.
Projects for Role [Role Name] — Expands the Roles filters to show all Role/Project combinations for the selected role. It is recommended that this option not be used.
Note To apply your filters, put a check mark in the box to the left of the option you wish to filter and click Apply Filters beneath the Options list. You may choose to apply more than one filter.
Roles Filters
The nodes available for each role can be viewed under Manage Navigation by placing a check mark next to the role and clicking Apply Filters beneath the Roles list. The Navigation Tree is filtered to display the nodes available to the users with the role.
You may also choose to view by multiple Roles.
When multiple roles are selected, the color of the links will vary:
Red—not visible to selected Roles
Blue—visible to all selected Roles
Green—visible to some of selected Roles but not all
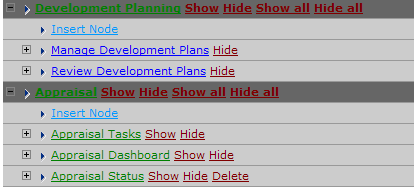
Standard Nodes
A Standard Node is a function that already exists. You may need to copy a Standard Node to another section of the Navigation Tree in order to customize a User’s access. If you choose Insert Node from the dark grey section, your new Node will be a Heading (parent). If you choose Insert Node from the light grey section, the new Node will be a Sub-Heading (child).
In this section |
|
© 2023 Rival. All rights reserved. |

 |