|
|
|
Add a custom node
Due to the complexity of adding custom nodes, it is highly recommended that you consult with your Rival WingSpan Implementation Consultant.
Follow these steps to add a custom node.
- From the Navigation bar under Site, select Manage Navigation.
- Scroll to the section in which you want to add a child node.
- Click the Insert Node link.

Note You may want to add a link to access Rival WingSpan user documentation. Under the User Preferences (Parent) you would insert a node containing an external link to your company’s intranet (see example below).
- Click the Select custom node to add radio button.
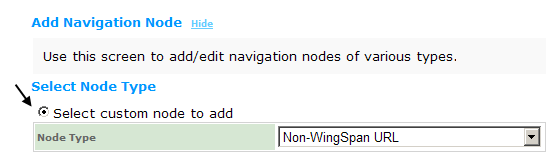
- Select the type of node from the drop-down menu.
- Scroll to the bottom of the screen and click Next.
- Enter the information in the form.
For this example:
- Specify the Display Name
- Add a Comment (optional)
- Enter a URL
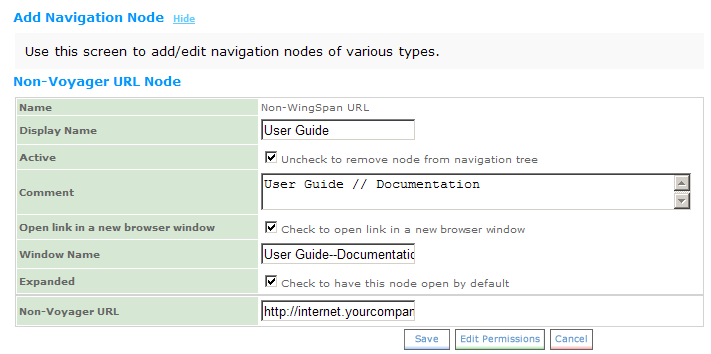
- Click Save.
- The new node will appear on your Navigation bar.
|
© 2023 Rival. All rights reserved. |

 |