|
|
|
Step 1: Create and download an import template
In this step, you create an import template by selecting an import type and choosing the import fields to include in the template.
Import type |
Description |
|---|---|
Create user |
Creates users in SilkRoad Onboarding and populates user details, EUP, assignment categories, key properties, team memberships, launch events, and more. |
Launch events |
Launches events for existing users. |
Update users |
Updates existing users and updates user details, EUP, assignment categories, key properties, team memberships, and more. |
Key info
- The templates are generic so that you can populate them based on your needs.
- When selecting import fields for a template, required fields are preselected (gray check mark) and you cannot de-select them.
- The list of available fields gets updated nightly to reflect any changes made from that day.
- The create user template does not have preselected required fields because of the pending user functionality.
- The template that is created is a Microsoft Excel file.
- The downloaded Microsoft Excel filename matches the import type. Example: CreateUsers.xslx.
- You can change a downloaded template's filename but do not change the worksheet tab name within it.
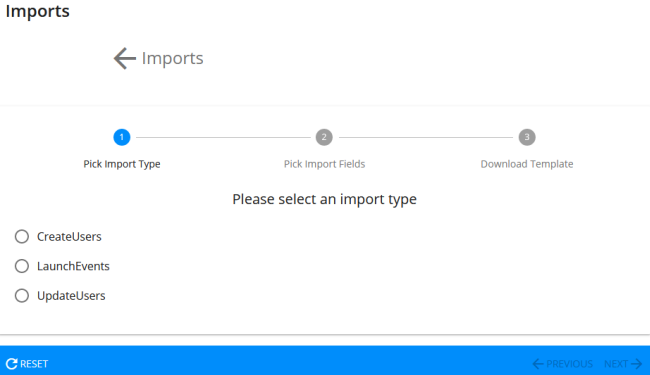
- From the Imports List page, click New Template.
- Select an import type, select Next.
- Select the fields to include on the template.
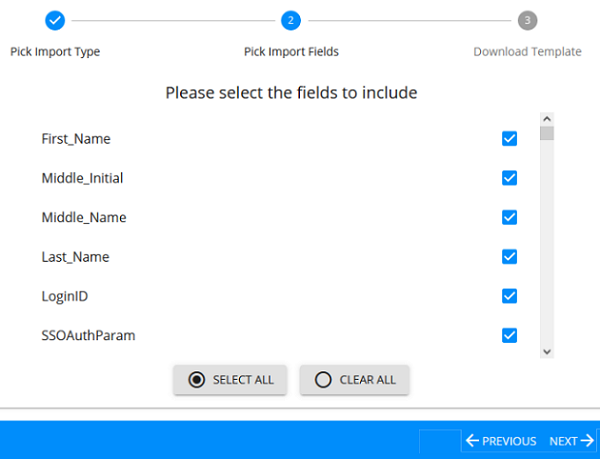
Tip: Click Select All to select all fields or Clear All to clear all fields.
- Click Next.
The fields you selected appear on the Download Template page.
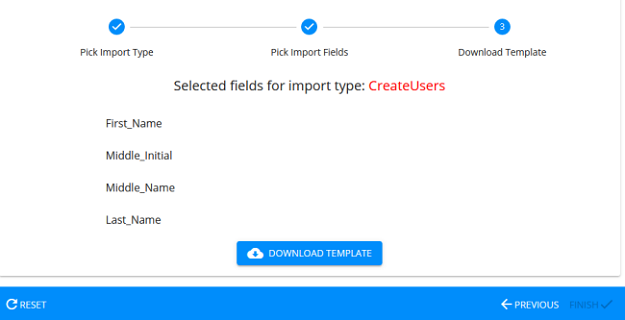
- If you need to add or change fields, click Previous. Otherwise, if all looks good, click Download Template.
- On the Save As pop-up window, save the template to your computer.
- Click Finish.
| ©2022 SilkRoad Technology. All rights reserved. |
| Last modified on: 9/14/2021 1:38:11 PM |