|
|
|
Create a new form using Form Builder
Follow these steps to create a new profile using form builder.
- From the Navigation bar under Content Management, select Manage Profiles.
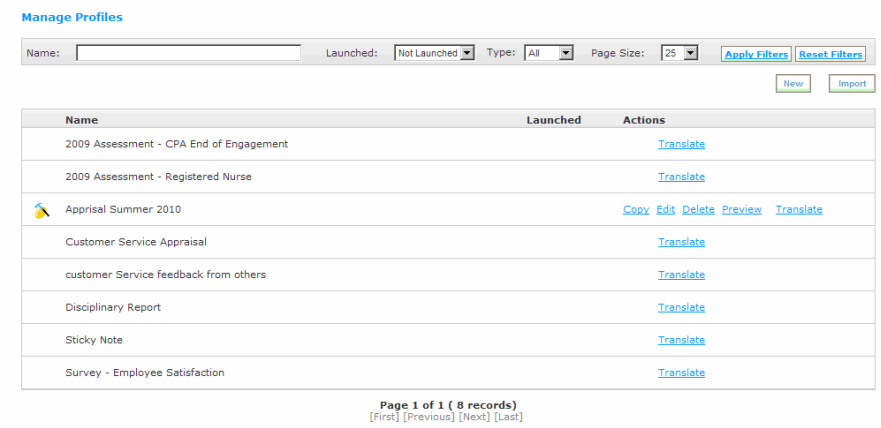
- Click New to access the Online Form Builder.
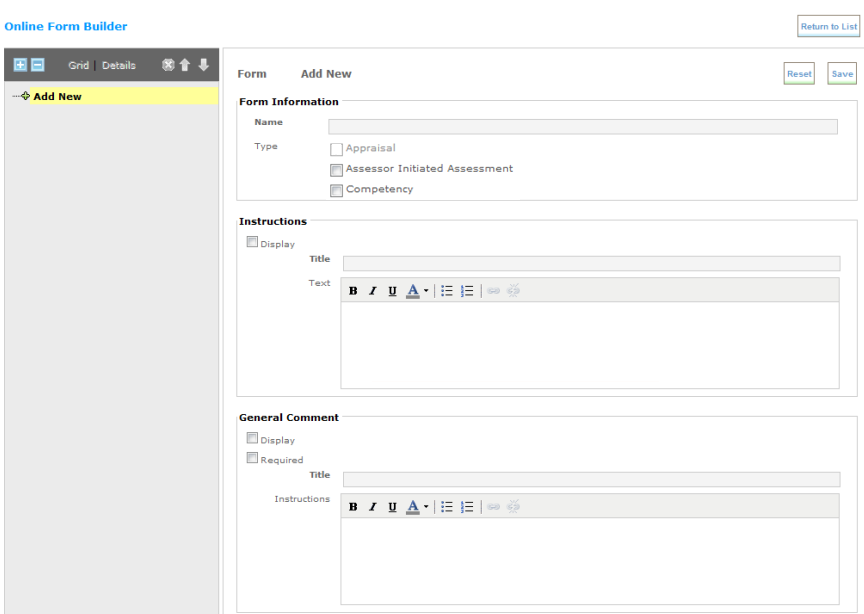
- The Online Form Builder displays. Enter a Form Name. This is the Profile Form Container.
You must select a unique name for the profile. In the event that the profile name already exists, a message will display at the top of the page.
- Optionally select a Form Type. You can select one or more types. Selecting a type makes the form available for use within Rival WingSpan.
A Form Type should only be chosen when the form is ready for use within Rival WingSpan. When a Type is chosen the form is available within drop-down lists for selection during a launch of that Type. For example, selecting a Form Type of Competency will make the form available on the Edit Assessment Group: Step 2 page in the Profile drop-down list.
To make a form available for use with an Assessment module launch, associate it with the Type "Competency ".
- Optionally choose to display and enter Form Instructions and General Comments.
- Place a check mark in the Instructions Display check box and enter an Instruction Title and Text.
- Place a check mark in the General Comment Display check box and enter a Comment Title and Comment Instructions.
- To make a comment required, make sure to place a check mark in the Required check box.
- Click Save to save the profile and then you can begin adding nodes. The form is saved and the tree navigation structure displays on the left of the screen.
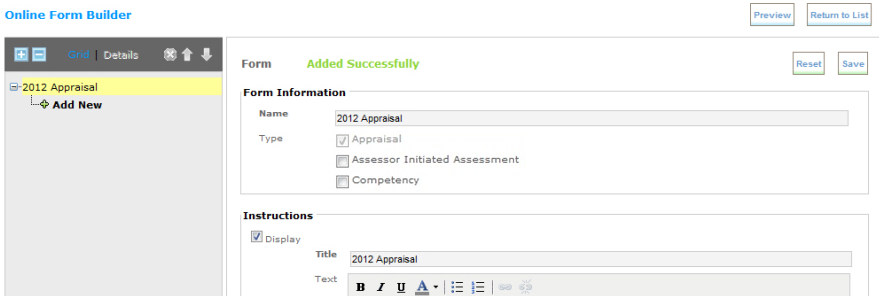
- Click Add New, from the navigation tree on the left, to add the Level 1 node.
- Enter the Name and Description. The name must be unique to any other nodes created within the form.
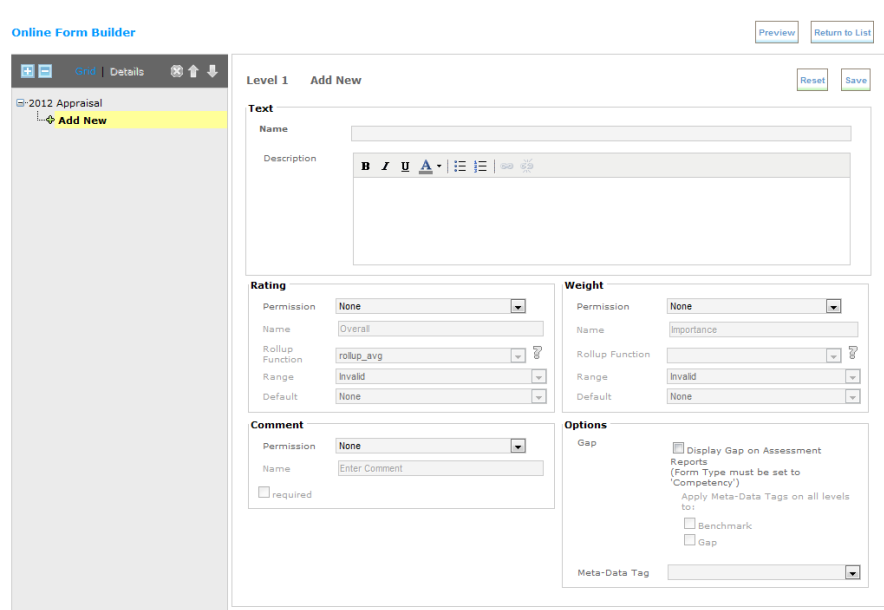
- Modify the configuration settings as needed for the Rating, Comments, Weight, and Options areas. Default settings for the display and rating/weight options are based on the defaults stored in the database.
Rating
Select the Permission from the drop-down field:
- None – Select this option if you don’t want to use the rating feature.
- Hide Rollup – Select this option to hide a default rating from the user.
- View Rollup – Select this option to enable the rollup feature. Enter a Name and select a Rollup Function from the drop-down list. The rollup feature allows for the ratings from lower levels to be rolled up and displayed. After selecting the rollup function, rollover the
 icon for a description of the function.
 - Edit – Select this option to edit the name and Range using the drop-down list.
Comment
Select Edit from the drop-down Comment field to enable the comment feature. Enter a comment name in the Name field. Check the required check box field to require the user to enter a comment. Select None to disable the comments feature.
Weight
Weights at all levels can be edited. Weights at levels 2 and 3 can be rolled up.
Choose one of the following from the Permission drop-down field:
- None – Select this option if you do not want to use the weight feature.
- Hide Rollup – Select this option to use the weight feature, but hide the rollup of weights from the user. Select the range from the list and select a value within the range.
- View Rollup – Select this option to use the weight feature and show the rollup of weights to the user. The value is displayed within the form but cannot be edited. Enter a name and select the range from the drop-down list.
- Hide Default – Select this option to hide any default weights from the user.
- Show Default – Select this option to show any default weights to the user.
Section Weight
Two-tier weighting can be configured. This section only displays when 100% weight validation is used (flag set during implementation). In the Level 1 Rating field, you must also set the Weight Permission field to Hide Rollup or View Rollup.
Choose one of the following from the Permission drop-down field:
- None – Select this option if you do not want to use the section weight feature.
- Hide Default – Select this option to hide any default weights from the user.
- Show Default – Select this option to show any default weights to the user.
Options
If you are on Level 1, the following fields display in this section.
- Gap - Click the Gap check box if you want to display Gap on Assessment reports.
- Meta-Data Tag - Use the drop-down list to select a Metadata tag. Metadata tags can also be set after the form is created.
If you are on any other level, the following fields display.
- Meta-Data Tag - Use the drop-down list to select a Metadata tag. Metadata tags can also be set after the form is created.
- Merge String – To merge data onto this form from your organization’s goal template or job template, select either GoalTemplate or JobTemplate. A metadata tag should not be set on a row containing a Goal Template merge string.
Please refer to Chapter 10, Interactive Reporting, for more information on metadata and metadata tag configuration.
Benchmark
This section displays when the Display Gap on Assessment Reports check box is selected in the Options section at Level 2. A benchmark must be set on all levels that contain a rating in order for the Gap to be calculated.
Select the Permission from the drop-down field:
- None – Select this option if you don’t want to use the benchmark feature.
- View Rollup – Select this option to enable the benchmark rollup feature. Enter a Name and select a Rollup Function from the drop-down list. The rollup feature allows for the benchmarks from lower levels to be rolled up and displayed. After selecting the rollup function, rollover the icon for a description of the function.
- Hide Rollup – Select this option to hide a default benchmark from the user.
- Show Rollup – Select this option to show a default benchmark to the user.
- Edit – Select this option to edit the name and Range using the drop-down list.
For additional information on these Online Form Builder configuration options, please contact your Silkroad Implementation Consultant.
- After entering and/or updating the configuration information, click Save. The node is saved and now displays on the navigation tree.
- After creating the new Form container and adding the Level 1 node (which displays as the Form Title), you can add one or more Level 2, 3, and 4 nodes.
- Use the navigation tree to add a new node by clicking on the
 icon to expand the tree view and select Add New in the location to add the new node.
 - Highlight to select the node to view/edit from the left navigation tree. The following options are available:
- Expand all nodes.
- Collapse all nodes to display only the Form, Level 1, and Level 2 nodes.
- Delete selected node. A confirmation pop-up displays. The Form and Level 1 nodes cannot be deleted.
- Move up the selected node. If the selected node has at least one higher sibling, the move-up button is enabled. Once the move-up button is selected, the node, along with its children, is moved up.
- Move down the selected node. If the selected node has at least one lower sibling, the move-down button is enabled. Once the move-down button is selected, the node, along with its children, is moved down.
- Preview the profile form.
- Add a new Level 2, 3 or 4.
The move up and move down option allows for only the reordering of nodes within a Level. It does not change the node hierarchy.
If the form does not display after selecting Preview, you may have a pop-up blocker enabled, preventing the form from displaying.
|
© 2023 Rival. All rights reserved. |

 |