|
|
|
Configure the comparison matrix
Follow these steps to configure a comparison matrix.
- From the Navigation bar under Succession Planning, choose Succession Planning Dashboard.
- Click
 on the Succession Planning Dashboard.
 - Click the Set Comparison Matrix tab.
- Select the
 icon.
icon.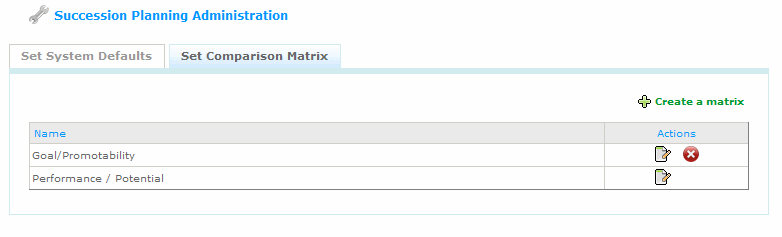
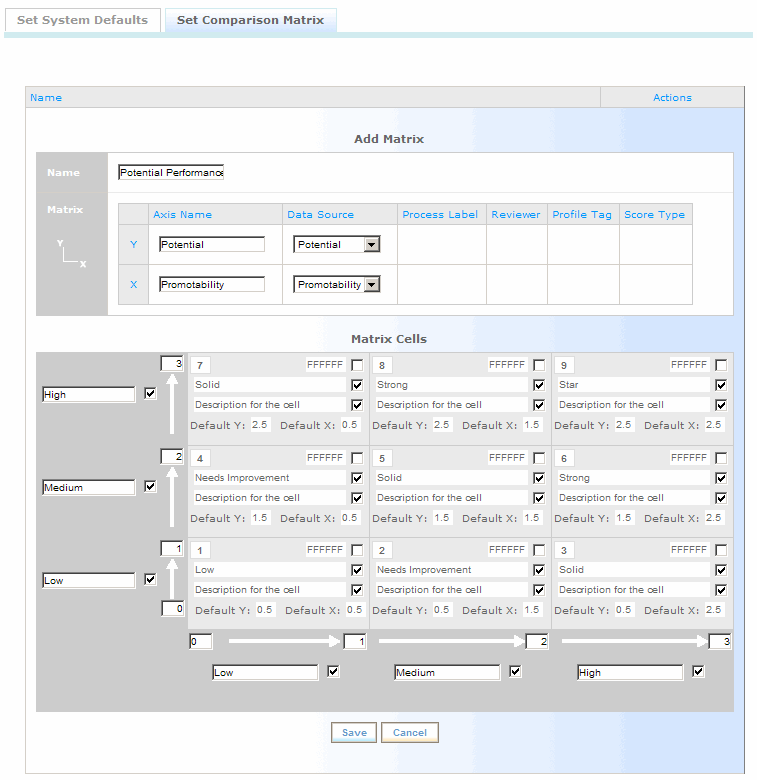
- Enter a name for the new Matrix.
- Enter a name for the Y and X axes.
- Using the drop-down field, select a data source for the Y and X axes.
Depending on your data source selection, additional options, such as Process Label become available. Make sure to complete any additional fields that are displayed.
- Enter the name and description for each cell.
- Optionally choose to update the cell colors. You can enter the hexadecimal color or select a color using the color picker.
- In addition, enter a label for each row. By default the row and column labels are displayed. To prevent a label from displaying remove the check mark from the check box.
- Once all of the information is complete in the Matrix, click Save.
|
© 2023 Rival. All rights reserved. |

 |